Garage Door Insulation - Installation Instructions
Suitable for use on manual, automatic up-and-over, side hinged, sectional, steel and GRP garage doors.
PLEASE NOTE:
- THE INSULATION IS INSTALLED AS 3 PANELS AND NOT AS 1 LARGE SECTION.
- THE TEMPERATURE OF THE DOOR CAN ADVERSELEY AFFECT THE ADHESIVE PADS. IF THE ADHESIVE PADS DO NOT STICK WELL, THE DOOR IS TOO COLD.
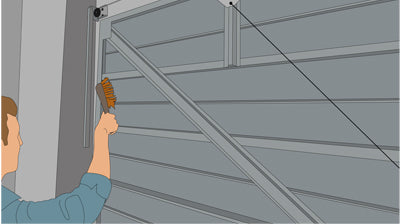
Preparing the installation area
Using a brush, remove all dust and dirt from the back of the garage door. Wipe clean with a cloth as required.
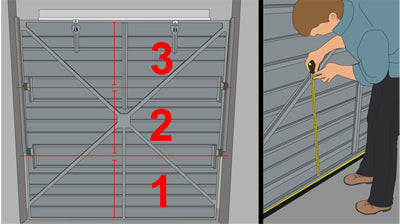
Marking out first insulation panel
Starting from the right side of the garage door, measure 714 mm from the bottom of the door. Make a mark with a pen on the door/edge or bracing. Repeat this process in the centre and on the left of the door.
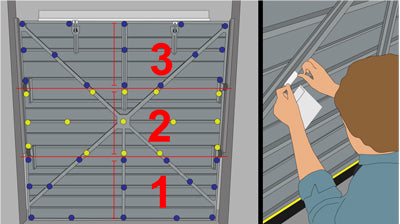
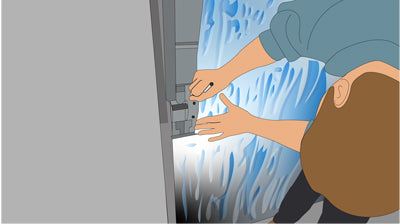
Position the adhesive pads for the first panel
Place the double-sided adhesive pads in the centre of the markings. Then continue to distribute the adhesive pads evenly (use approximately 15 pads) across the bottom third of the garage door. Press down firmly on the pads to ensure a good bond.
NB: Do not remove the backing paper from the pads at this point.
Measuring the door
Using a tape measure, measure the width of the door. Note this measurement.

Cut the insulation to size for the first panel
With a pen, mark the previously noted measurement on the insulation material. Then, using the scissors, cut the insulation to size.
Secure the first insulation panel to the door
Remove the backing paper from the adhesive pads. Working from one side, secure the insulation material to the pads. Ensure the insulation material is taut when bonding it to the pads. The bottom third of the door is now insulated.
Remove cables (optional)
If appropriate, remove any fixed cables prior to fitting the insulation. These will be reinstalled in a later step. If you do not do this step the locking cables may not be accessible as they will be hidden behind the insulation panels.
Prepare the middle insulation panel
Hold the insulation up to the door. For garage doors with protruding latches, draw the shape that is needed to be cut out of the insulation material. With scissors, cut the previously drawn shapes of the latch/cables.
Tip: To replicate, fold the insulation material in half, trace the shape on the other side and cut the shape out with the scissors.
Preparing and installing middle and top sections
Repeat steps 2, 3, 4, and 5 for the remaining two-thirds of the garage door.
Taping the joins between panels
To finish, apply the aluminium foil tape across the two joins on the insulation material.

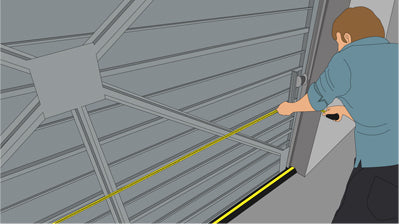
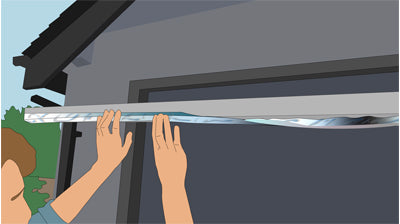
Sealing the edges of the door
Apply the aluminium tape along the side and top edges of the door. Over-hang half of the tape and then wrap the tape over the edge of the garage door to create an effective seal and a neat finish.
Securing latches (optional)
Secure latches in place once the insulation material is secured. Apply extra tape around the latches to create a tight seal and neat finish.